Configure Linux FluentD

'Thanks' written in collage form for many languages
Thanks

What are you Fluent in?


Join me as we configure FluentD on Linux, and continue to improve and document monitoring cross-platform (UNIX/Linux) servers.
Background:
Some of our previous topics included UNIX logical disk class differ from Windows (here), and cross platform agent setup.   Because we always ‘need more power!’, it’s time to configure Linux FluentD.  All this, because the ‘Linux FluentD’ was updated on docs.microsoft.com!

Don’t worry, if you’re on the edge, this may be a Scotty moment of “I’m giving her all she’s got” with your current monitoring environment.


Maybe you’re thinking ‘convince me’, so what does FluentD provide monitoring wise?

    • System Center Operations Manager (SCOM) 2016+ has enhanced log file monitoring capabilities for Linux servers.
    • Wild card characters in log file name and path.
    • New match patterns for customizable log search
    • Use community published plugins versus having to build from scratch


I wanted to take a moment to validate the steps provided, not just because I’ve had a pretty large part of my career supporting cross-platform environments for large enterprise companies.  So, let’s get started!


Review the FluentD setup procedure 

Let’s speed up the ‘do’ part.  Review the procedure at docs.microsoft.com

FluentD basic operation here

Configuration Overview here

FluentD pre-reqs

Server types are covered = Linux (RedHat/Ubuntu)

Management Packs required for SCOM
        • Load latest Linux Operating system management packs (2019).
          1. Find the pack download here
          2. Load the relevant Linux or Universal Linux packs
          3. Verify Microsoft.Linux.Log.Monitoring pack is loaded
Verify ID/password and sudoers capability for root

Use docs article if you need additional assistance to install agent on the Linux server.  Alternatively, use my blog posts for PowerShell or GUI install


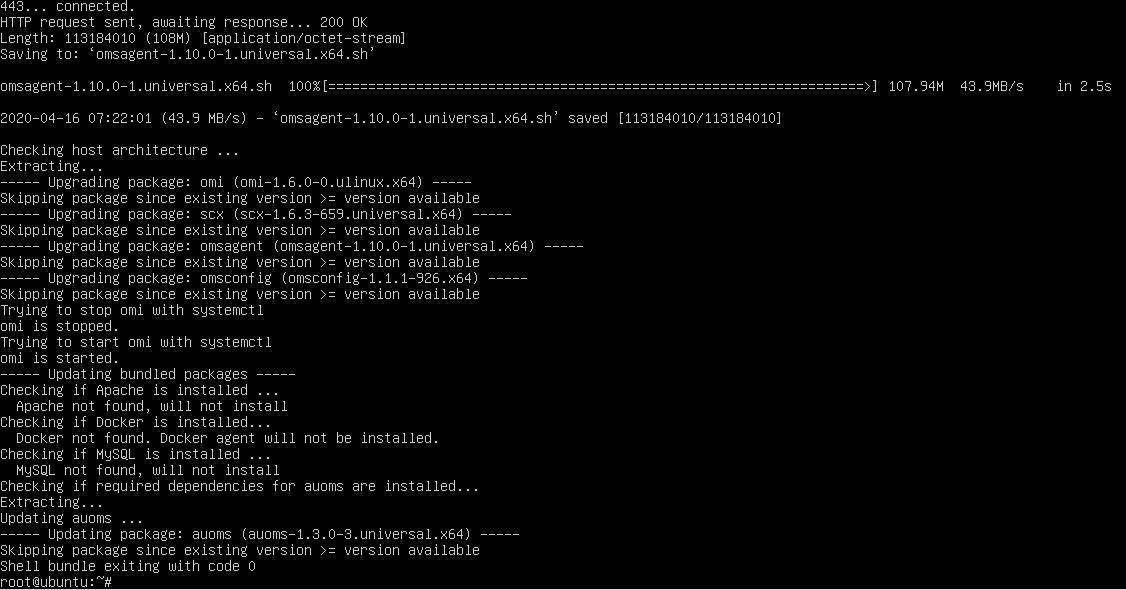
Update agent to latest release

Grab the latest OMS Agent release from github

      • From server command line:

wget https://raw.githubusercontent.com/Microsoft/OMS-Agent-for-Linux/master/installer/scripts/onboard\_agent.sh

sh onboard_agent.sh

            1. The wget command above will install the OMSAgent and it’s pre-req packages
            2. This includes OMI, scx, OMSAgent, OMSConfig, auoms,  Apache, Docker, MySQL (if the last three apply to your Linux server)

Load Management packs from latest UNIX release.

Verify packs are version 10.19.1082.0

Navigation steps:

From SCOM Console > Administration Tab > Installed Management packs

List of Linux based SCOM management packs installed needed to configure Linux FluentD


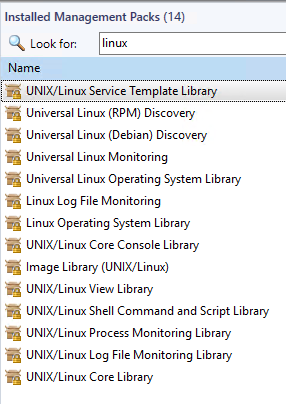
After adding the updated Linux Management packs

Screenshot list of 10.19.1082.0 versioned Linux management packs required to 'configure Linux FluentD'


Linux server screenshots installing OMSAgent via wget command

Output from the wget command to install omsagent on Linux server

screenshot saving file from GitHub to Linux server

Install of oms agent components on Linux server


Stay tuned, I’m currently testing FluentD configuration on my 2019 UR1 lab environment on Ubuntu16.


SQL on Windows Addendum pack

It’s spring time; time to tune the SQL carb!


Carbs are way less easy to find these days, but I’ve been busy tuning the SQL agnostic pack (MSSQL on Windows).


Tuning the SQL Agnostic pack would be far less successful without expert help.  My thanks to Brandon Pires – MCS SQL Consultant who helped provide a SQL DBA perspective.   Brandon’s LinkedIn profile


Always grab an expert, and for SQL, it’s a DBA.  If you’re new to SCOM, most product teams provide their management packs.  SCOM PFE’s build addendum packs to improve a pack (from our perspective).  Addendum packs make the a pack stronger, for an improved customer experience.  I’m not complaining at what the pack delivers.  The SQL Team is awesome for taking user feedback and making improvements quarterly!


Background:

Initially this journey started out with Tim McFadden disabling the duplicate rules/monitors in the SQL MP’s (here).

After talking with Tim and Kevin H, I set out to clean up the SQL version specific packs to remove bloat by creating the version specific OFF packs.  The OFF packs disabled the plethora of SQL performance counters (see MP bloat blog here).

With the SQL Agnostic packs (thank God!), I wanted to deliver an addendum pack to tune the SQL alerts/health for what SQL PFE/Consultants recommended for an improved out of the box experience (OoBE).


MP Version history
v1.0.0.0 24 Feb 2020 Override to enable SQL Monitoring
v1.0.0.1 24 Feb 2020 Override pack cleanup to human readable format
v1.0.0.2  2 Mar 2020 Overrides for severities and SQL CPU samples
v1.0.0.3  2 Mar 2020 Overrides for SQL rules for warning
v1.0.0.4  4 Mar 2020 Completed overrides for SQL warning rules

v1.0.0.5  1 Apr 2020 Updated rules for backup failures when customer uses Netbackup vs. SQL agent/scheduled tasks

v1.0.0.6  9 Apr 2020 Created groups for seed discovery Test/Dev and Prod; excluded EXPRESS, disabled Securables monitor

v1.0.0.7 15 Apr 2020 Updated pack name to include ‘SQL Server’.

Updated AddendumGroupGUIDUpdate to include RegEx pattern replace
AddendumGroupGUIDUpdate will version pack to v1.0.0.7 for group GUID and regex changes


Please feel free to download the zip file, which includes the XLS for review of what was updated.

My website download


Additional References

The Agnostic OFF Pack to turn off the performance rules (found here)

The old SQL version specific OFF packs for the performance counters can be found here.

TechNet Gallery download here


Windows Server 2016 vuln found in Security scans

FYI – came across this today with a customer where Security scans SCOM servers.


Please note this is NOT a SCOM issue or vulnerability, and SCOM uses TLS1.2 just fine.


Found CVE-2017-8529 vulnerability on a SCOM server, so though this a good idea to communicate to the larger audience, in case Security finds vulnerabilities, based on customer 2016 server hardening.

CVE-2017-8529 details:

The remote Windows host is missing security update KB4022715 or a Registry key to prevent the host against CVE-2017-8529. It is, therefore, affected by an information disclosure vulnerability exists in Microsoft browsers in the scripting engines due to improper handling of objects in memory. An unauthenticated, remote attacker can exploit this, by convincing a user to visit a specially crafted website, to disclose files on a user’s computer.

The easiest way I found to update the server was via these two registry keys (32 bit and 64bit keys below)

# KB4022715
# Add registry key
reg add “HKLM\SOFTWARE\Microsoft\Internet Explorer\Main\FeatureControl\FEATURE_ENABLE_PRINT_INFO_DISCLOSURE_FIX” /v “iexplore.exe” /t REG_DWORD /d 0 /f
reg add “HKLM\SOFTWARE\WOW6432Node\Microsoft\Internet Explorer\Main\FeatureControl\FEATURE_ENABLE_PRINT_INFO_DISCLOSURE_FIX” /v “iexplore.exe” /t REG_DWORD /d 0 /f

References

https://community.tenable.com/s/article/CVE-2017-8529-Plugins-returning-in-scan-results-Not-a-false-positive

https://portal.msrc.microsoft.com/en-US/security-guidance/advisory/CVE-2017-8529

UNIX Logical Disk classes

Time to talk about SCOM2019 UNIX classes!


Just came across an example where the UNIX Logical disk class was targeted.


Did you know: This class in the UNIX library is not like the Windows library, where Logical Disk has a matched discovery.

Logical Disk is broke out to the various UNIX flavors, where the version of UNIX has it’s own class and discovery, but the class refers to the base class of UNIX Library.


Let’s go through an example from the SCOM Console

Monitoring Tab > Discovered Inventory > Change Target Type


This lab example is for an Ubuntu (Universal Linux Library)

The Logical Disk target for the UNIX/Linux Core Library has the same output in SCOM for the flavor (i.e. Logical Disk for the Universal Linux Operating System)


How’s that possible… ?

Let’s look at the examples for the various Logical Disk Classes.

Example

AIX 7 pack – AIX Logical disk discovery/class

<ClassType ID=”Microsoft.AIX.LogicalDisk” Abstract=”true” Accessibility=”Public” Hosted=”true” Singleton=”false” Base=”Unix!Microsoft.Unix.LogicalDisk” />

Universal Linux Monitoring Library

<ClassType ID=”Microsoft.Linux.Universal.LogicalDisk” Accessibility=”Public” Abstract=”false” Base=”Linux!Microsoft.Linux.LogicalDisk” Hosted=”true” Singleton=”false” Extension=”false” />

Linux Operating System Library

<ClassType ID=”Microsoft.Linux.LogicalDisk” Accessibility=”Public” Abstract=”true” Base=”Unix!Microsoft.Unix.LogicalDisk” Hosted=”true” Singleton=”false” Extension=”false” />


This makes sense, as Linux operating systems are SUSE, RHEL, Universal Debian and RPM.  Solaris and AIX are their own operating systems.  This helps describe the class hierarchy.

UNIX

Flavor of Unix (Linux, Solaris, or AIX)

Version or flavor of Linux, Solaris, or AIX


How did I get to this conclusion?

MPViewer will help view the classes and discoveries.

What does this mean to me:    Create a single view to view ALL  UNIX ‘Logical Disk’ entries discovered.  As the UNIX flavors all use UNIX Logical Disk class for their base class,  ALL the inherited classes are displayed.


AIX Logical Disk Discovery


Univeral Linux Discovery

Universal Linux Classes


Windows Server packs are very similar

Windows Logical Disk class


Using Unix MP’s for Shell commands and scripts

Ready to move out of the UI ?

Thanks to Saurav Babu, and Tim Helton’s help, I was able to push my MP authoring limits further.

The good thing with the Shell command template in SCOM is that your script is encoded.

Bad news

  1. If functionality doesn’t exist in the UI, you can’t easily pull the monitor and just add variables to get that functionality.
  2. Scripts and Shell commands are encoded (great news for security!)

Now to the use case – need Sample Count and Match Count to prevent false positive alerts

The UNIX Shell Command library allows us to use the following variables out of the box:

Interval, SyncTime, TargetSystem, UserName, Password, Script, ScriptArgs, TimeOut, TimeOutInMS, HealthyExpression, ErrorExpression

AND we can override Interval, Script, TimeOut, TimeOutInMS

If that’s not enough options, then read on!

When the built-in functionality doesn’t exist

For this UNIX shell command/script monitor, we required SampleCount and MatchCount

Variables explained

SampleCount is the number of times (samples for an alert).

If SampleCount = 4, this means 4 samples will generate an alert

MatchCount is the number of intervals before monitor state changes

If Interval = 60 (s), and MatchCount = 10, then it will take 10 minutes (600s before we alert)

Combining the 2 means 4 samples over 10 minutes will generate an alert.

Sometimes this is called alert suppression or counting failures before alerting

Built a custom DataSource, ProbeAction, and WriteAction, as the UNIX Shell Library MP did not include these additional variables.

Please review my updated MP Fragments TechNet Gallery for the custom MP and fragments!

https://gallery.technet.microsoft.com/Uncommon-Custom-MP-c5a12a86

Encoding the script or command to run

The other issue with UNIX scripts and commands, is the UI encodes the scripts.

How do we get around it you ask?

Since we are building an MP Fragment and MP, we must figure out how to encode.

To encode the script to put into your SCOM monitor (and MP Fragment)

Example

$script = ‘if [ `ps -ef | grep sleep | grep -v grep | wc -l` -eq “1” ]; then echo false; else echo true; fi’

# Verify script variable
$script

# Get $script bytes
$s = [System.Text.Encoding]::UTF8.GetBytes($script)

# Verify script bytes output (optional as bytes broken out by line)
$s

# Encode script to Base64
$encoded = [System.Convert]::ToBase64String($s)

# Verify $encoded
$encoded

# Optional
# Verify string converts back properly
[System.Text.Encoding]::UTF8.GetString($s)

$encoded output is what needs to be entered into the <script></script> variable in your monitor

Example Output

PS C:\Users\scomadmin\desktop> $script = ‘if [ `ps -ef | grep sleep | grep -v grep | wc -l` -eq “1” ]; then echo false;
else echo true; fi’
PS C:\Users\scomadmin\desktop> $script
if [ `ps -ef | grep sleep | grep -v grep | wc -l` -eq “1” ]; then echo false; else echo true; fi
PS C:\Users\scomadmin\desktop> $s = [System.Text.Encoding]::UTF8.GetBytes($script)
PS C:\Users\scomadmin\desktop> $s
PS C:\Users\scomadmin\desktop> $s = [System.Text.Encoding]::UTF8.GetBytes($script)

PS C:\Users\scomadmin\desktop> $encoded = [System.Convert]::ToBase64String($s)
PS C:\Users\scomadmin\desktop> $encoded
aWYgWyBgcHMgLWVmIHwgZ3JlcCBzbGVlcCB8IGdyZXAgLXYgZ3JlcCB8IHdjIC1sYCAtZXEgIjEiIF07IHRoZW4gZWNobyBmYWxzZTsgZWxzZSBlY2hvIHRydWU7IGZp
PS C:\Users\scomadmin\desktop> [System.Text.Encoding]::UTF8.GetString($s)
if [ `ps -ef | grep sleep | grep -v grep | wc -l` -eq “1” ]; then echo false; else echo true; fi
PS C:\Users\scomadmin\desktop>

References

Jonathan Almquist’s blog post

Kevin Holman’s blog on service with Samples

Using SharePoint On Premise Diagnostic tool

Futuristic, perhaps, but a powered screwdriver for space, almost looks like Han Solo’s pistol (sans scope)

From previous intro, we start using the tool to diagnose SharePoint problems.

Let’s install, and get to using it!

Once this is released, I expect this to be posted to a GitHub repository.

For now, there will be some mystery for obtaining the file bundle.

Copy folder from build zip file.

Paste to SharePoint machine, whatever standard you use.

From my own past, I prefer a MonAdmin (Monitoring Admin) directory, with a scripts sub-directory, then toolname/version

Example

cd ‘C:\Monadmin\Scripts\OPD-D2.0.1905.15001’

Start OPD via powershell

cd ‘C:\Monadmin\Scripts\OPD-D2.0.1905.15001’

.\OPD-console.ps1

Avoid some initial questions

cd ‘C:\Monadmin\Scripts\OPD-D2.0.1905.15001’

.\OPD-console.ps1 -mode SharePoint -ShareTelemetry Yes -AcceptEula

PS C:\Monadmin\Scripts\OPD-D2.0.1905.15001> .\OPD-console.ps1 -mode SharePoint -ShareTelemetry Yes -AcceptEula

Using OPD to check SharePoint environment

Start with the OPDLog Event Log

OPD Main menu

1 – Administration

Central Admin site

Current patch level

Emails

Timer jobs

2 – Performance

3 – Search

Search Hosts Online

Unable to retrieve topology

4 – Services

5 – Setup

Binaries

6 – User Profile

Firewall ports (duplicated from section 4)

Happy checking and to building new SharePoint checks!

SharePoint Management framework Private Preview


Do you have an Enterprise SharePoint farms that you manage health and performance via custom scripts?

Have you used SETH to manage SharePoint 2010 problems with the farm(s)?


Would you want a scalable tool you can add your own scripts and enable/check, and then alert on what you want?


Background

SharePoint Engineer Troubleshooting Helper (SETH) was a Microsoft tool for SharePoint 2010

Using SETH

Troubleshooting SETH


For SharePoint 2016 and 2019, the Customer Support team brought up the need for bringing back a utility to help with common SharePoint scenarios

On Premise Diagnostic (OPD) is the second generation of project (for SharePoint 2016 and 2019).


My goal was to help the Escalation Engineers have a full platform that can be implemented and is scalable for the technical community to maintain and use.


BTW, the only thing preventing 2013 SharePoint support is the dependency on WMF v5.0 or better on SharePoint servers.


SCOM management pack can be found here


Updated Skype for Business 2015 Addendum pack

Continuing work with Nick Wood on the Skype pack for additional operational features.

Previously Blogged about this July 2018, and continue to make improvements

The TechNet gallery bundle is updated with new functionality.

Skype KHI addendum

Pack gathers the Skype KHI performance counters

Packets * Discards performance rules where greater than 100 discards are seen on NIC’s,

Monitoring Tab folder/performance view

Skype Custom Overrides

Includes common overrides for noisy monitors/rules.

Install SCVMM management packs from VMM Server

Time for some automation

Ever have to upgrade SCVMM packs every time a new Update Release (UR) comes out?

Copy the files off from the VMM server to your SCOM MS, install.

How long does that take?

Try this script out – assuming you have a login on the VMM Server

TechNet Gallery post here

# Set up some variables

$UR=”UR5″

$VMMServer = “16VMM01”

# Set up your path, this example is monadmin\backup

$date = Get-Date -UFormat “%Y-%m-%d”

# Set up backup path

$backupPath = “C:\monadmin\backup”

$backupDrive = “C:”

# Create some functions

Watch them roll, let PowerShell do your work!

UR6 packs

SCOM management packs backed up

Check out the SCOM Console Admin tab for updates!